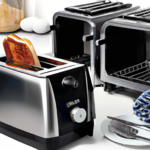
In this article, we will guide you through the process of cleaning a toaster oven, step by step. From removing the crumbs to tackling those stubborn stains, we’ve got you covered. By the end of this article, you’ll have all the knowledge and tips you need to keep your toaster oven sparkling clean and ready for your next delicious meal. So let’s get started!
Overview
Cleaning a toaster oven is an important task that should be done regularly to maintain its efficiency and prolong its lifespan. Over time, toaster ovens can accumulate crumbs, grease, and food debris, which can lead to unpleasant odors, smoke, and even fire hazards. By following a few simple steps, you can easily clean your toaster oven and keep it in great working condition. In this article, we will guide you through the process of cleaning a toaster oven, from gathering the necessary supplies to reassembling the appliance after cleaning.
Importance of cleaning a toaster oven
Cleaning a toaster oven is not only essential for maintaining its performance and durability, but it also ensures a safe cooking environment. As you use your toaster oven to prepare meals and snacks, it’s easy for crumbs and food particles to accumulate inside the appliance. Over time, these build-ups can create a breeding ground for bacteria, mold, and pests, which can contaminate your food and compromise your health. Additionally, a dirty toaster oven can emit unpleasant odors and cause smoke during cooking, which can affect the taste and quality of your food. Regularly cleaning your toaster oven not only improves its efficiency but also promotes healthier and safer cooking.
Frequency of cleaning a toaster oven
The frequency of cleaning your toaster oven depends on how often you use it. If you use your toaster oven frequently, it’s recommended to clean it thoroughly at least once every two weeks. For occasional users, a monthly cleaning should suffice. However, it’s important to keep an eye on any accumulation of crumbs or debris and clean them promptly to maintain a clean and efficient toaster oven. Regular cleaning not only ensures proper functioning but also makes the task less time-consuming and challenging.
Preparation
Before you begin cleaning your toaster oven, it’s essential to gather the necessary supplies and ensure safety measures.
Gathering necessary cleaning supplies
To clean your toaster oven, you will need:
- Mild dish soap
- Warm water
- Soft microfiber cloth or sponge
- Non-abrasive scrub brush or toothbrush
- Baking soda (optional, for stubborn stains)
- Vinegar (optional, for removing odors)
- Rubber gloves (optional, for sensitive skin)
Having these supplies ready will make the cleaning process efficient and effective.
Ensuring safety measures
To ensure your safety while cleaning a toaster oven, follow these precautions:
- Unplug the toaster oven: Always make sure your toaster oven is unplugged before cleaning. This prevents any potential electrical accidents.
- Allow the toaster oven to cool down: Do not attempt to clean a toaster oven immediately after use. Give it enough time to cool down to avoid burning yourself.
- Read the manufacturer’s instructions: Before beginning the cleaning process, consult the user manual or any specific instructions provided by the manufacturer. Different toaster ovens may have different cleaning requirements and guidelines.
By following these safety measures, you can minimize the risk of accidents and ensure a safe cleaning process.
Exterior Cleaning
Cleaning the exterior of your toaster oven not only improves its appearance but also prevents the transfer of dirt and grime to your hands or other surfaces.
Removing crumbs and debris
Start by removing any loose crumbs or debris from the toaster oven. Gently shake the appliance over a sink or trash can to dislodge and discard these particles. Alternatively, you can use a soft brush or the crevice tool of a vacuum cleaner to remove any accumulated debris.
Cleaning the control panel and knobs
To clean the control panel and knobs, dampen a soft microfiber cloth or sponge with warm soapy water. Wring out any excess liquid to avoid dripping. Gently wipe the control panel and knobs, paying special attention to any buttons or crevices. Avoid using excessive water or scrubbing too hard, as this can damage the control panel.
Wiping the exterior surfaces
Using the same damp cloth or sponge, wipe down the exterior surfaces of the toaster oven. Start from the top and work your way down, ensuring that you clean the sides, back, and bottom of the appliance as well. Pay extra attention to areas that may have grease or stubborn stains. If necessary, you can add a small amount of baking soda to the damp cloth or sponge to tackle tough stains or grease. Rinse the cloth or sponge as needed and continue wiping until the exterior surfaces are clean.
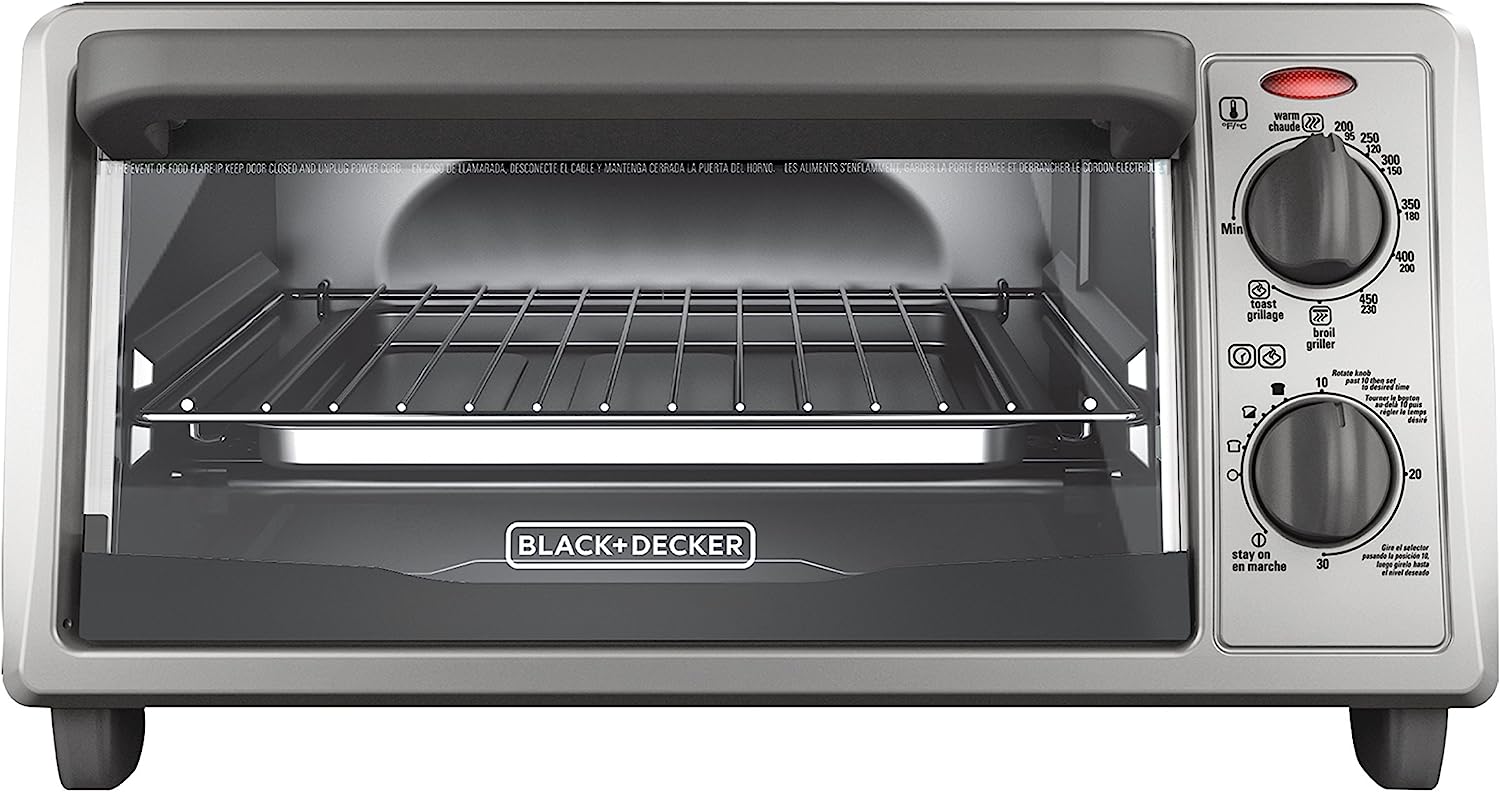
Interior Cleaning
Now that you have cleaned the exterior of your toaster oven, it’s time to tackle the interior. Cleaning the interior not only removes food residue but also ensures that your toaster oven operates efficiently and odor-free.
Removing oven racks and accessories
Before cleaning the interior, remove any oven racks and accessories. These can be washed separately in warm soapy water and dried thoroughly before reassembling the toaster oven.
Scrubbing the interior walls and ceiling
Using a soft microfiber cloth or sponge, dip it into warm soapy water and wring out any excess liquid. Gently scrub the interior walls and ceiling of the toaster oven, paying special attention to areas with visible food residues or stains. If necessary, you can create a paste of baking soda and water and use it to scrub stubborn stains or grease. Ensure that you rinse the cloth or sponge frequently and change the water as needed to achieve optimal cleaning results.
Cleaning the heating elements
To clean the heating elements of your toaster oven, it’s important to follow the manufacturer’s instructions. Some toaster ovens may have removable heating elements, while others may require a different cleaning method. If the heating elements are removable, take them out and clean them separately according to the manufacturer’s guidelines. If they are not removable, use a soft cloth or sponge to gently wipe them down, being careful not to damage the elements.
Removing stubborn stains or residue
If you come across stubborn stains or residue that doesn’t seem to come off with regular cleaning, there are a few tricks you can try:
- Baking soda paste: Create a paste by mixing baking soda with a small amount of water. Apply the paste to the stained area and let it sit for a few minutes. Scrub gently with a soft brush or toothbrush, then rinse with warm water.
- Vinegar solution: Mix equal parts of vinegar and water in a spray bottle. Spray the solution onto the stained area and let it sit for a few minutes. Scrub gently with a soft brush or toothbrush, then rinse with warm water.
Note: Always test these methods on a small, inconspicuous area of the toaster oven first to ensure they do not cause any damage or discoloration.
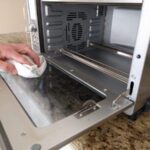
Cleaning the Glass Door
The glass door of your toaster oven can accumulate fingerprints, grease, and food splatters over time. Cleaning the glass door not only improves the appearance of your toaster oven but also allows you to monitor the cooking process more clearly.
Removing and cleaning the glass door
To remove the glass door, consult the manufacturer’s instructions. Different toaster ovens may have different mechanisms for detaching the glass door. Once the glass door is removed, place it on a soft surface or towel to prevent any scratches.
Fill a sink or basin with warm soapy water. Submerge the glass door into the soapy water and let it soak for a few minutes. Using a soft cloth or sponge, gently scrub the glass door to remove any stains or grease. Rinse thoroughly with warm water and dry with a clean cloth or towel. Make sure the glass door is completely dry before reattaching it to the toaster oven.
Cleaning the door seals
The door seals are responsible for creating a tight seal when the toaster oven is closed. Over time, these seals can accumulate dirt, crumbs, and grease. To clean the door seals, dampen a soft cloth or sponge with warm soapy water and gently wipe them down. Make sure to remove any debris or residue that may be stuck in the seals. Rinse the cloth or sponge and wipe the seals again to remove any soapy residue. Dry the seals thoroughly before reattaching the glass door.
Cleaning the Crumb Tray
The crumb tray is an important component of a toaster oven as it collects crumbs, drippings, and food debris during the cooking process. Cleaning the crumb tray not only prevents odor build-up but also reduces the risk of fire hazards.
Removing and emptying the crumb tray
To remove the crumb tray, consult the manufacturer’s instructions. It is usually located at the bottom front of the toaster oven. Gently pull out the crumb tray and discard any contents into a trash can. Be careful not to spill any crumbs or debris onto the floor or countertop.
Cleaning the crumb tray
Wash the crumb tray in warm soapy water, using a soft cloth or sponge to remove any dried residue or grease. If necessary, you can use a non-abrasive scrub brush or toothbrush to tackle stubborn stains. Rinse the crumb tray thoroughly with warm water and dry it completely before reattaching it to the toaster oven.
Cleaning the Accessories
Cleaning the accessories of your toaster oven, such as oven racks, baking pans, and broiling racks, is just as important as cleaning the main components of the appliance. Properly maintained accessories not only extend their lifespan but also ensure optimal cooking results.
Cleaning the oven racks
To clean the oven racks, remove them from the toaster oven and wash them separately in warm soapy water. Use a soft cloth or sponge to remove any baked-on food debris or grease. If the oven racks have stubborn stains, you can make a paste of baking soda and water and apply it to the stains. Let the paste sit for a few minutes, then scrub gently with a non-abrasive scrub brush or toothbrush. Rinse the oven racks thoroughly with warm water and dry them completely before reassembling the toaster oven.
Cleaning the baking pan and broiling rack
The baking pan and broiling rack can be cleaned using the same method as the oven racks. Wash them separately in warm soapy water and use a soft cloth or sponge to remove any food debris or residue. If necessary, you can use a non-abrasive scrub brush or toothbrush to tackle tough stains. Rinse them thoroughly with warm water and dry them completely before reassembling the toaster oven.
Reassembly
After cleaning all the components of your toaster oven, it’s time to reassemble them.
Putting back the oven racks and accessories
Start by placing the clean oven racks back into the toaster oven. Ensure they are positioned correctly and securely. Next, reattach the baking pan and broiling rack according to the manufacturer’s instructions. Make sure they are clean and dry before inserting them into the toaster oven.
Attaching the glass door and crumb tray
Carefully reattach the glass door to the toaster oven, following the manufacturer’s instructions. Ensure it is properly aligned and securely attached. Finally, insert the clean and dry crumb tray back into its designated slot at the bottom front of the toaster oven. Ensure it is fully inserted and secure.
Final Touches
Before plugging in and testing your toaster oven, perform some final touches to ensure it is clean and ready to use.
Wiping down the exterior surfaces
Using a soft microfiber cloth or sponge, give the exterior surfaces of your toaster oven one final wipe-down. Pay attention to any areas that may have been missed during earlier cleaning. Ensure that all surfaces are clean and dry before proceeding.
Plugging in and testing the toaster oven
Finally, plug in your toaster oven and perform a test run. Set the toaster oven to a low heat setting and let it run for a few minutes. Monitor for any unusual smells, smoke, or malfunctions. If everything looks and sounds normal, your toaster oven is ready to use!
Conclusion
Cleaning a toaster oven is a simple yet essential task that ensures its optimal performance, longevity, and safety. By following the steps outlined in this article, you can easily and effectively clean your toaster oven. Remember to gather the necessary supplies, ensure safety measures, and follow the manufacturer’s instructions. Regular maintenance of your toaster oven will not only keep it in great working condition but also allow you to enjoy clean and delicious meals every time you use it.